
Understanding Kitchen Worktops Installation
What is Kitchen Worktops Installation?
Kitchen worktops installation refers to the process of fitting and securing various types of work surfaces in a kitchen space. These surfaces, commonly known as countertops, can be made from a variety of materials, including laminate, granite, wood, and quartz. The installation not only involves placing the worktop on the cabinet base but also includes cutting out spaces for sinks, hobs, and other appliances. For accurate and successful installation, understanding the specific requirements and techniques related to different materials is essential.
Importance of Proper Installation
Proper installation of kitchen worktops is crucial for several reasons. Firstly, it ensures functionality, allowing for effective use of the kitchen space. A well-installed worktop contributes to the overall aesthetic appeal, enhancing the kitchen’s design. Moreover, correct installation prevents future issues such as water damage, instability, or uneven surfaces. Poorly fitted worktops can lead to misalignments, making it difficult to integrate appliances seamlessly and may cause costly repairs in the long run. Understanding these principles emphasizes the importance of undertaking Kitchen Worktops Installation with care and precision.
Overview of Worktop Materials
There are multiple materials available for kitchen worktops, each with its pros and cons. The most common include:
- Laminate: Affordable and available in various designs. Easy to clean but can chip and scratch.
- Granite: Highly durable and heat-resistant. Offers a high-end look but can be expensive and requires sealing.
- Wood: Provides warmth and character. Needs regular maintenance and can be susceptible to water damage.
- Quartz: Engineered stone that combines beauty with durability. Low maintenance but may be pricier.
- Stainless Steel: Modern and hygienic; excellent for commercial kitchens. Prone to scratches and dents.
Preparation for Kitchen Worktops Installation
Tools and Materials Needed
Before starting the installation process, it’s essential to gather the necessary tools and materials. Commonly required tools include:
- Measuring tape
- Level
- Carpenter’s square
- Jigsaw or circular saw
- Drill and drill bits
- Screwdrivers
- Clamps
- Sealant or adhesive
- Protective gear (gloves, goggles)
In addition to tools, ensure you have your selected worktop material, screws, brackets, and any additional fittings required for a seamless installation process.
Measuring Your Space Accurately
Taking precise measurements is a foundational step in kitchen worktops installation. Use the measuring tape to define the length and width of the cabinets where the worktop will sit. Always measure multiple times to avoid errors. It’s advised to account for any overhangs or cutouts required for sinks and appliances. Furthermore, keeping a record of your measurements will facilitate a smoother installation process.
Choosing the Right Worktop Material
The selection of worktop material significantly influences both aesthetics and functionality. When making a choice, consider factors such as durability, maintenance requirements, and style preferences. For example, if you frequently cook and require a durable, heat-resistant surface, granite or quartz may be ideal. Conversely, if budget is a primary concern, laminate could be a practical choice. Consider seeking samples to visualize how different materials will look in your kitchen.
Step-by-Step Guide to Kitchen Worktops Installation
Removing Old Worktops
Before installing new worktops, you must safely remove the existing ones. Begin by disconnecting appliances and removing any sinks or hobs. Use the screwdriver to unscrew fasteners securing the old worktop. If it is glued or sealed, carefully use a jigsaw or utility knife to cut through the sealant. Make sure to handle the materials with care to avoid damage to cabinetry or other surfaces.
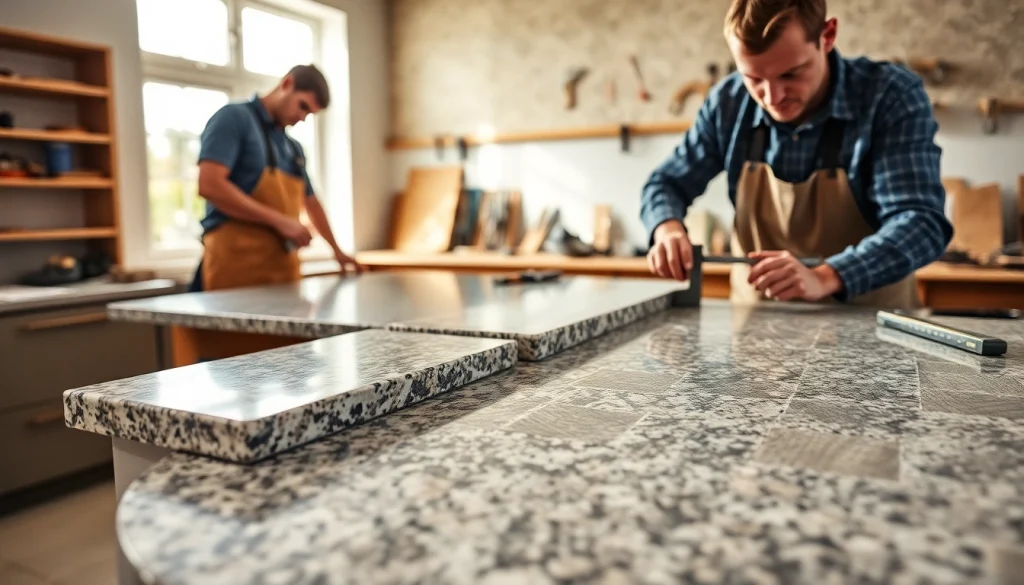
Cutting and Fitting New Worktops
Once the old worktops are removed, you can start cutting and fitting the new worktops. Refer to your measurements to guide you. Take extra caution when using power tools, ensuring you wear proper protective gear. If you’re working with solid materials like granite or quartz, opting for a professional cutting service may be advantageous. Dry-fit the worktops before securing them in place to ensure proper fit and alignment.
Securing Worktops Properly
Securing the worktops involves using screws and brackets to hold the pieces in place. Begin by applying adhesive or sealant along the edges and underneath the worktop where it meets the cabinets. Fasten using wood screws, ensuring not to overtighten, as this can damage the material. For seams between worktops, use joining strips for a seamless finish and apply silicone sealant for waterproofing.
Common Challenges During Kitchen Worktops Installation
Dealing with Uneven Surfaces
One common challenge faced during installation is dealing with uneven surfaces. Before installation, use a level to check the cabinets for flatness. If you find unevenness, consider shimming the cabinets with wooden blocks to create a stable base for your worktops. This adjustment simplifies the fitting process and helps avoid gaps or wobbles.
Properly Joining Worktops
Joining worktops can be tricky. Always ensure that the edges that will be joined are perfectly cut to fit snugly. Using a joining strip and sealant will provide added stability and prevent moisture from seeping in. In some instances, utilizing biscuits or dowels can add strength to the joint. Plan your joints ahead, particularly in corners or complex layouts, to guarantee an aesthetically pleasing result.
Handling Material Breakages
Breakages may occur during the cutting and handling of materials, especially with fragile options like granite. Always handle worktops with care, and if a break occurs, consider repairing options like resin fillers for small chips. If using solid materials, consult a professional for repairs or replacements to avoid compromising the entire installation.
Cost Considerations in Kitchen Worktops Installation
Estimating Installation Costs
Estimating the cost of kitchen worktops installation requires a consideration of various factors including the chosen material, kitchen size, and installation complexity. Generally, the cost of materials and labor combined can range widely. Simple installations can be relatively inexpensive, while high-end materials with custom cuts may lead to significantly higher expenses.
Factors Influencing Pricing
Factors that influence pricing include labor costs, the type of material chosen, cutting and finishing requirements, and any modifications for sinks or appliances. Additionally, the geographical location can impact costs due to regional variations in labor rates. Always conduct thorough research and consider seeking quotes from multiple contractors if professional installation is desired.
Potential Additional Expenses
Additional expenses may arise from unexpected complications, such as repairs to underlying cabinetry, disposal of old worktops, or necessary plumbing adjustments for sinks. To avoid surprises, always factor in a contingency budget—an additional 10-20% of your total project cost may help manage unforeseen challenges effectively.
Frequently Asked Questions
How much does it cost to install a kitchen worktop?
The cost of installing kitchen worktops ranges typically from £750 to £1,900, depending on the material, complexity, and additional modifications required.
How long does it take to install kitchen worktops?
Generally, the installation can take between a few hours to a full day, depending on the size of the kitchen and the material used.
Can I install worktops myself?
Yes, DIY installation is possible for those with skills in carpentry, though professional help can ensure an ideal fit and finish.
What type of worktops is most durable?
Granite and quartz are typically among the most durable options due to their resistance to scratches and heat.
Do I need to seal my worktop?
Sealing is necessary for porous materials like granite to prevent stains and damage from spills. Regular maintenance is also recommended.